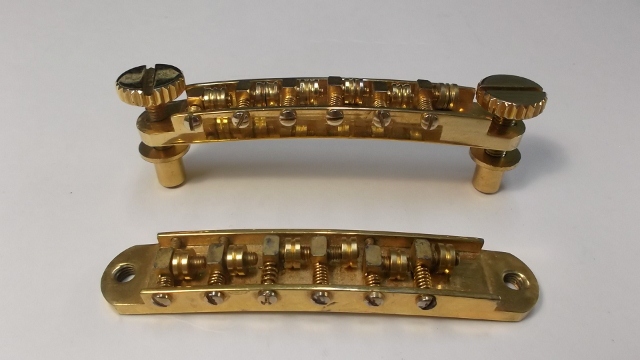
early 70's S-100 bridges

drc

Senior Member
Joined
Mar 18, 2012
Messages
3,761
Reaction score
805
Location
Minneapolis metro area, Minnesota
So whats the best solution to keep them from rocking back and forth? Maybe silicone tape? That might snug it up some?

I'm tempted to remove the whole damn thing and replace it with a post '76 version.

I know this probably has been discussed before... tuff! LOL
 

Zelja

Senior Member
Joined
Feb 26, 2011
Messages
3,913
Reaction score
357
Location
Sydney, Australia
I need to do this as well. For a Jazzmaster I used that conductive copper tape around the posts but I was also thinking of just using some washers on the S-100. I'd like to know what others have done as well.
 

Los Angeles

Senior Member
Joined
Nov 23, 2011
Messages
2,228
Reaction score
35
Location
Ventura, CA
Guild Total
20
This is one of about a billion reasons why I prefer the late 70's S-100s over the early 70's versions.

Anyway, I once had a cherry S-100 that had an extrememly loose bridge. It had lots of space to work with, so my solution was to take the guitar down to the hardware store where they sell 12" lengths of thin-walled brass or aluminum tubing like this:

1040429_large.jpg


I found a piece of aluminum that fit around the post and AND inside the mount, cut a little piece off with a dremel cutoff wheel and tapped the post in. The fit was so snug that it was a pain in the neck to turn the post after that, but at least the guitar stayed in tune. The best part about this was it was not a permanent alteration.

Another solution could be to use aluminum adhesive tape that they use for duct work. That would only require scissors. you also don't need to wrap the entire post, but maybe just half of it to act like a shim.
 
Last edited:
Joined
Mar 9, 2011
Messages
584
Reaction score
97
On my 1973 S-100SC I replaced the bridge adjuster screws with stainless steel hex head bolts which I cut and filed several times until I had the perfect length to tighten into the bridge and end up with the action I prefer. I filed the bottom of the bolt perfectly flat and combined with the DR .011 strings I use my bridge a nice and stable. I buffed the tops of the bolts so they look like chrome and I don't have the knurled adjuster screw heads sticking up and interfering with my hand. I didn't want to cut the orig. adjuster screws so they are in the case pocket. It worked really well for me. On my 1973 Starfire IV I have no problem at all but there again I use DR .011 and the bridge on the Starfire is a lot higher with more down pressure. I hope this helps. Now I have to go get the S-100 out.
Thanks John
By the way, really nice S-100 dave.
 

SFIV1967

Venerated Member
Joined
Nov 20, 2010
Messages
18,500
Reaction score
9,024
Location
Bavaria / Germany
Guild Total
8
Dave: I am just curious, where exactly is the problem? What is lose?
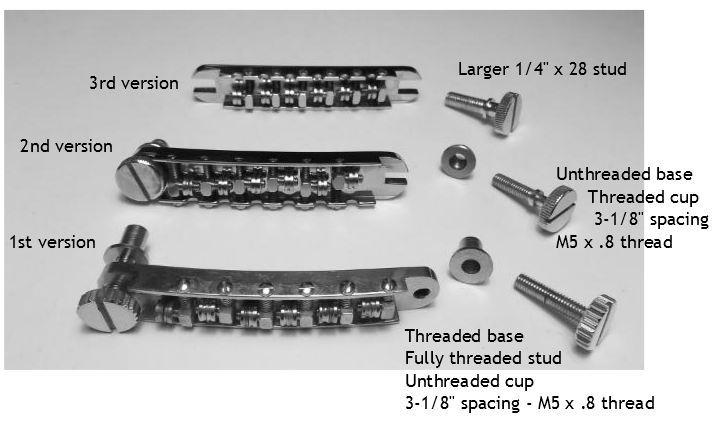
Using that picture from Ken Nash:

guild88.jpg


Ralf
 

SFIV1967

Venerated Member
Joined
Nov 20, 2010
Messages
18,500
Reaction score
9,024
Location
Bavaria / Germany
Guild Total
8
The bridge posts are not threaded into the inserts, so its loose enough that the bridge rocks back and forth. Make sense?
Ah! Yes, makes perfect sense now. I never thought about it. Since the bridge base is threaded the grommet/cup need to be unthreaded, otherwise you could not adjust the bridge height (turn the screws). So LAs idea with aluminum adhesive tape could be one possible solution.

And now I also understand the difference to the next version bridge (the middle version on below Ken Nash picture), where the bridge base is unthreaded but the grommet/cup is threaded. Something new learned!

muller.png


Ralf
 
Last edited:

kakerlak

Senior Member
Joined
Apr 6, 2009
Messages
2,354
Reaction score
128
Location
Oklahoma
I used a wrap or two of teflon plumber's tape on the S-100 I sold -- both on the thumbscrews and on the individual saddle rollers. It snugged it right up -- some of the play was actually b/w the threds in the thumbscrews and the threaded holes in the bridge itself, so being able to "thicken" the threads was a big help. There's enough down-pressure on the bridge that I sort of doubt much issue would exist with looseness b/w the posts and cups in which they seat.

But the biggest source of lost string energy and faint buzz/hum was the saddles -- tape helped there, too. (There's no real need for them to turn freely with a stoptail, once the string spacing is sorted out)

[EDIT] I've also heard of people using clear nail polish to lock in the threads once they're satisfied with the adjustment. And, I can't speak for all bridges; there may well be some with vibration issues b/w cups and posts. MY '74 SF-VI, is nice and tight all-round, but the '71 S-100 wasn't...
 
Last edited:

Zelja

Senior Member
Joined
Feb 26, 2011
Messages
3,913
Reaction score
357
Location
Sydney, Australia
^^^^
Good point about the saddles.I have heard about people using Loctite on Jazzmaster saddles I wonder if anyone has used them on these bridge saddles as well?
 

kakerlak

Senior Member
Joined
Apr 6, 2009
Messages
2,354
Reaction score
128
Location
Oklahoma
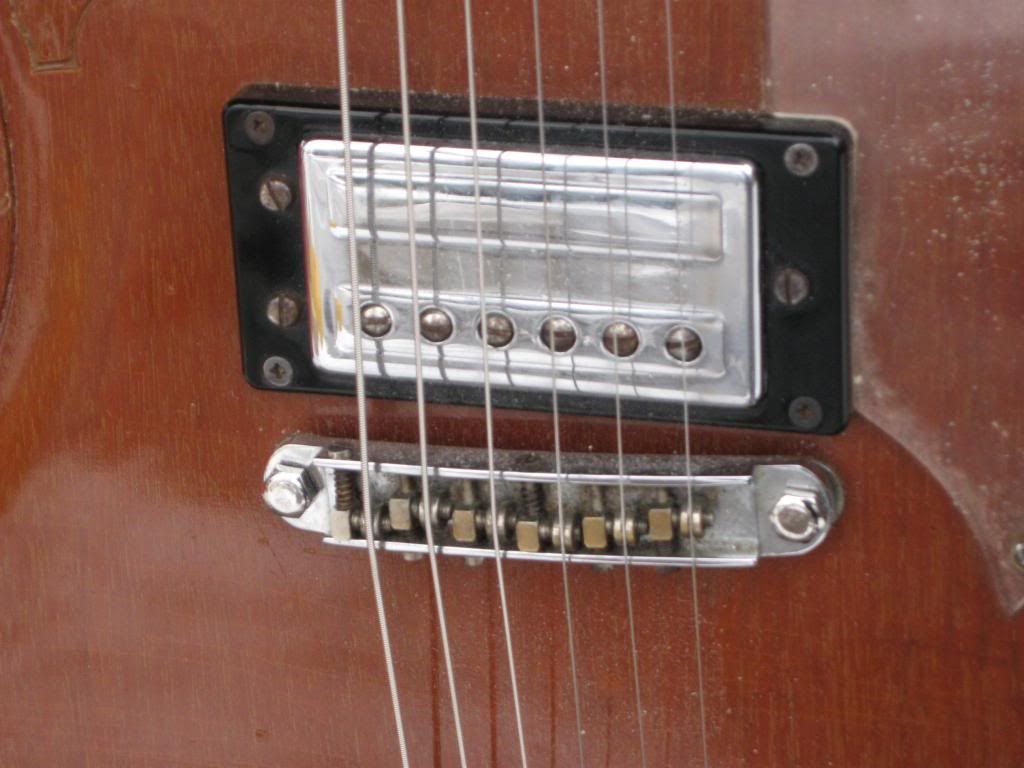
Nice, an offset just like an S-100! I got the Mastery bridge for mine.

I shimmed my neck back and raised the (stock) bridge up near the limit of its adjust range. I alse made a crude string tree (visible in the photo) that I've since removed, as the shim+bridge raise is plenty of down-tension on its own.

I always got the idea that the Mastery bridge would make for awkward palm muting, with its recessed string paths -- how do you like it?
 

Zelja

Senior Member
Joined
Feb 26, 2011
Messages
3,913
Reaction score
357
Location
Sydney, Australia
I always got the idea that the Mastery bridge would make for awkward palm muting, with its recessed string paths -- how do you like it?
It's actually fine for palm muting, the flesh on the palms gets into the little valleys where the strings are so no issue (& I haven't got fleshy hands). I've just got a CIJ '66 Reissue with some Novak PUs. I'm going to try putting 250k pots in to tame the highs (& some of the noise). Just gotta get around to it...one day...
 
Joined
Mar 9, 2011
Messages
584
Reaction score
97
Another solution I have discussed with one of my techs is to pull the cups and install custom made inserts with untapped holes that just fit the screws. This also would allow you to move the holes slightly off center to get better intonation. Plus you could make the inserts slightly shorter to give more room to lower the bridge as the inserts on my S-100SC sit proud of the top. I didn't do this as my intonation is close and my action is as low as want it with some adjustment still left but it would be a solution that is completly reversible.
Thanks John
 

leonc

Member
Joined
Apr 4, 2009
Messages
102
Reaction score
0
Location
Upstairs, L.A.
My S100 deluxe has a Guildsby so the bridge rocking was an issue. I used plumber's teflon tape around the posts to thicken them and hold them in place; works pretty well, requires no alterations and it's quite inexpensive.
 
Joined
Jul 9, 2014
Messages
5
Reaction score
0
Bumping this thread because I believe I found a better solution than using teflon or some kind of shim.

I tried teflon(PTFE) tape, found it awkward, ugly and and tape kept unwinding every time I raised or lower the bridge. I didn't want stringly white ptfe tape visible either.

So I had some 3.2mm heat shrink, I widened the end a bit with some players and slipped it over the thread, heated it up and the fit is perfect and it doesn't come off when you insert it in and out of the cup. Looks neat too.

 
Top