Making my Starfire I a Starfire II

lungimsam

Senior Member
Joined
Oct 1, 2011
Messages
2,618
Reaction score
1,674
Guild Total
2
First step-
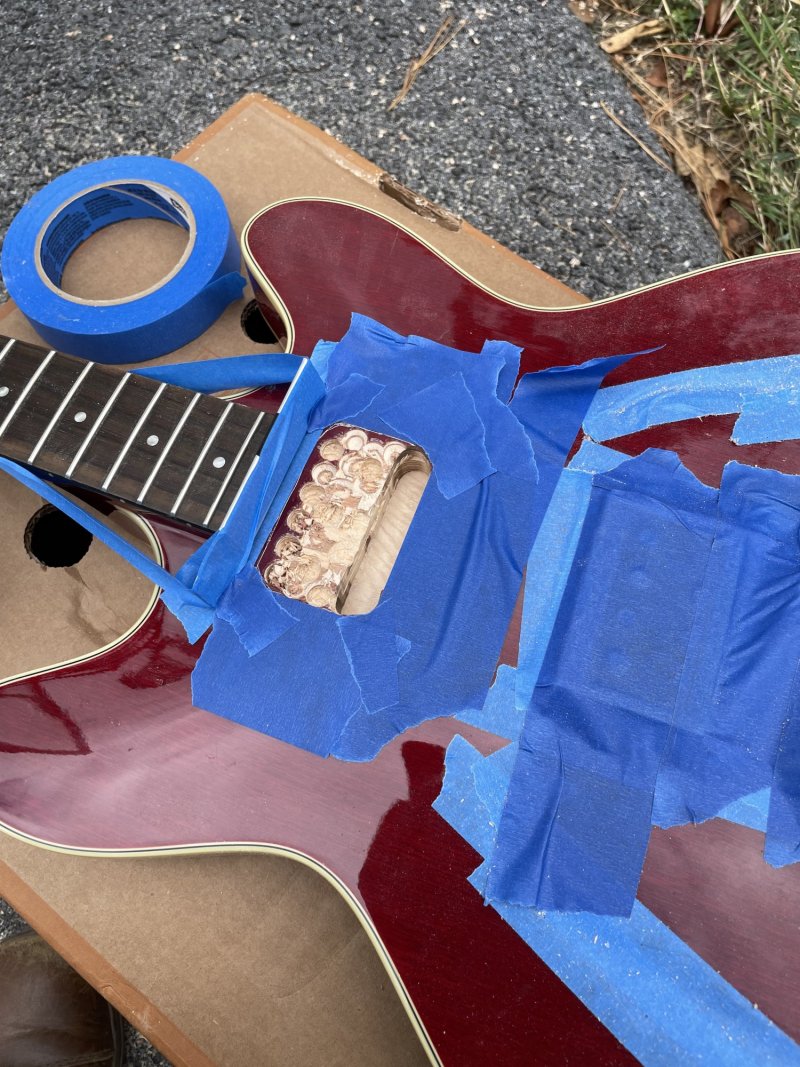
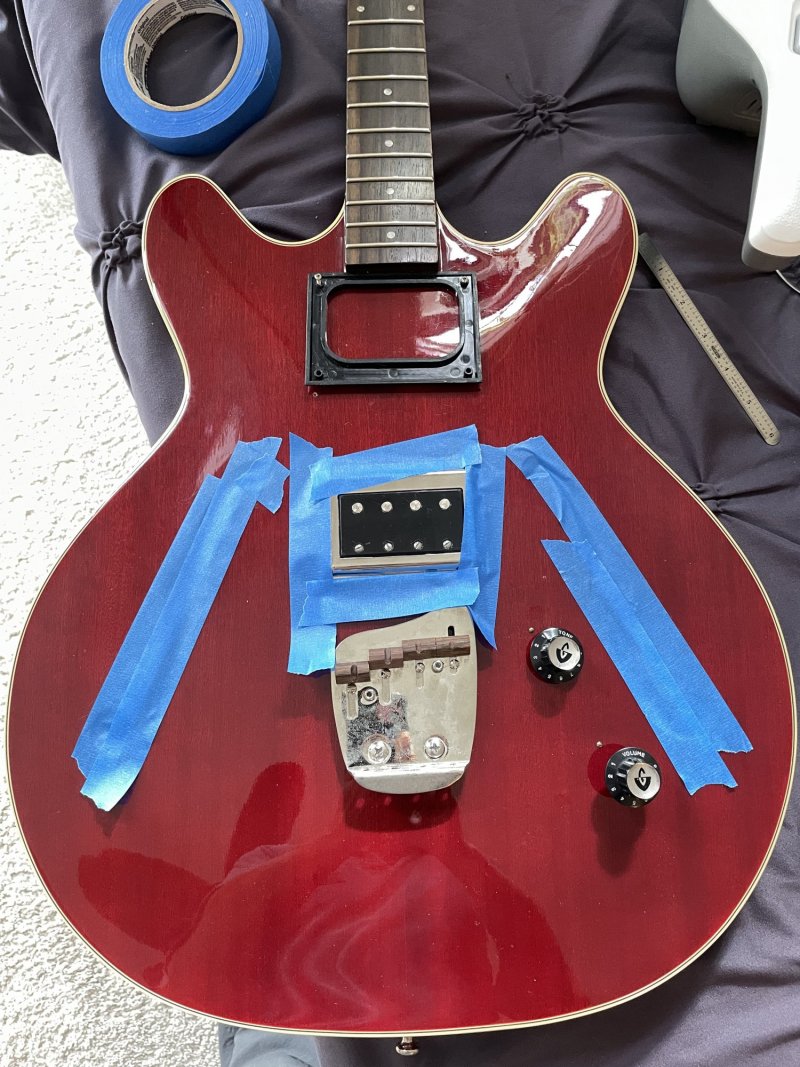
Measure a lot. The black bezel is a touch smaller on its inside hole than the factory hole cut for the bridge hole so using the bezel as a template since means less material will be removed but the pup will still fit.
Oriented it like the neck PUP of the II and flipped it face down get better contact against the face. Drilled the 4 holes and putting screws in to stabilize. Haven’t decided is should draw trace it and then route by freehand or to use the bezel as the routing template. I don’t wanna damage the bezel. Pardon my crooked Bridge pick up as it’s not screwed in because I’m using it’s bezel to trace the neck hole.
 

Attachments

  • 6EC03E27-22B8-40C4-B9E0-711A79E96EB3.jpeg
    6EC03E27-22B8-40C4-B9E0-711A79E96EB3.jpeg
    640.4 KB · Views: 766
Last edited:

lungimsam

Senior Member
Joined
Oct 1, 2011
Messages
2,618
Reaction score
1,674
Guild Total
2
Doin it freehand. Don’t wanna mess up the bezel. Scored outline with razor first. Had to bust up the poly coat with a drill first cuz it was makin the router erratic. Router won’t get close enough to the neck so have to use a dremel gingerly from here on out. You can see the initial slot that the router worked well on. I sanded little in the pocket and drilled a hole for the pickup leads. Will use a little clear nail polish to seal the edges of the pocket where the poly terminates and open pocket begins.
Note my taped on metal guard for the end of the neck.
 

Attachments

  • 7FB8A4AB-90BC-465F-B4DA-1620C4E93F3E.jpeg
    7FB8A4AB-90BC-465F-B4DA-1620C4E93F3E.jpeg
    685 KB · Views: 145
Last edited:

lungimsam

Senior Member
Joined
Oct 1, 2011
Messages
2,618
Reaction score
1,674
Guild Total
2
Fits!! I did not notice a tenon. This is the existing bridge pup as the neck pup still coming from Guild. Put it in there for fun. You can still see the original screw holes from the rosewood thumb rests in the body just outside the southside of the black bezel there.!! But no biggie. Next step, wait for pots and pickup to arrive and do up the new harness. In meantime I hope to do up a cardboard harness template. Just gotta decide where to drill for a blend knob as this will be MV/Blend/Tonestyler harness.

Side note: This is the Bisonic bridge pup that came stock on this bass and the plastic/melty surround cracked many years ago and the pup was then unusable. I wrote about it in a thread here. Recently, LTG member Default kindly offered to look it over and try to fix it - which he did!!! He used adhesive to attach the pup to the silver surround so it is like one unit now. Originally the pup was separate from the silver surround. He also shielded the back and put on new leads. I installed it when I got it back and it is silent - no RF or A/C noise!!! I never knew a single coil could be made to be totally silent of noise. Sounds better than ever. I will put it back in the bridge pocket when the neck pup arrives. Gotta remember to take pics of the shielding and start a thread on the pup repair done by Default.
 

Attachments

  • D8FDD36F-201B-49EA-80CA-30CC46BFF6D1.jpeg
    D8FDD36F-201B-49EA-80CA-30CC46BFF6D1.jpeg
    455.2 KB · Views: 140
Last edited:

lungimsam

Senior Member
Joined
Oct 1, 2011
Messages
2,618
Reaction score
1,674
Guild Total
2
I’m holding out for a Hipshot bridge replacement one day! I think the rosewood saddles will work in the meantime. I like them better than the brass at this point anyway. They don't slide around.
I am so happy I did not damage anything in the routing process. A little chipping of the poly on the south edge but other than that it looks good. Praise the Lord it turned out good.
 
Last edited:

lungimsam

Senior Member
Joined
Oct 1, 2011
Messages
2,618
Reaction score
1,674
Guild Total
2
Drilled hole for blend knob. Was gonna do it in between v and old tone hole but looked too tight when they are straight in a row. The triangular setup still looks nice and gives a little room for my fingers to figure out which knob I am grabbing - I hope!
 

Attachments

  • 4B7614A4-1355-480E-BF67-E2CD96CD1177.jpeg
    4B7614A4-1355-480E-BF67-E2CD96CD1177.jpeg
    385.4 KB · Views: 138
Last edited:

lungimsam

Senior Member
Joined
Oct 1, 2011
Messages
2,618
Reaction score
1,674
Guild Total
2
Made harness template by laying cardboard on top and poking where the pot holes are. Just waiting on the blend pot, another Guild black/silver volume knob, and the pup to arrive now. I think they will come by Wednesday or Friday.
Dig the old Tonestyler 16! Gonna be tight in there. Will work out the orientation of the pots later for easiest wire connection set up
 

Attachments

  • 21B39434-450D-4622-81E5-02CF4AC18048.jpeg
    21B39434-450D-4622-81E5-02CF4AC18048.jpeg
    581.4 KB · Views: 134
  • 34D56363-836E-4AC0-BC4D-D627A669C96B.jpeg
    34D56363-836E-4AC0-BC4D-D627A669C96B.jpeg
    571.6 KB · Views: 138
Last edited:

lungimsam

Senior Member
Joined
Oct 1, 2011
Messages
2,618
Reaction score
1,674
Guild Total
2
Possibly the most crucial step- go for a ride!!!
 

Attachments

  • 2EF66B01-A828-400C-AECB-C71314CAA06C.jpeg
    2EF66B01-A828-400C-AECB-C71314CAA06C.jpeg
    381.4 KB · Views: 126

lungimsam

Senior Member
Joined
Oct 1, 2011
Messages
2,618
Reaction score
1,674
Guild Total
2
Yes. Must be very patient and cautious. Works really well but have to take it calmly.
 

lungimsam

Senior Member
Joined
Oct 1, 2011
Messages
2,618
Reaction score
1,674
Guild Total
2
Here’s the v/blend/Tonestyler wiring diagram from Don at Stellartone I will use, minus the ground lead screwed into body, which isn’t necessary on a Starfire. Of course, my pots will be oriented differently and I am using Bisonics, but the hookups are the same.
 

Attachments

  • B786FE9B-B361-443D-9FDC-F58A7A90B28E.jpeg
    B786FE9B-B361-443D-9FDC-F58A7A90B28E.jpeg
    861 KB · Views: 131

thornev

Junior Member
Joined
Oct 15, 2021
Messages
79
Reaction score
33
Location
Hudson Valley NY
Guild Total
1
Is the purpose of the blend control to replace what would be on a Starfire II a 3-way selector?
 

lungimsam

Senior Member
Joined
Oct 1, 2011
Messages
2,618
Reaction score
1,674
Guild Total
2
Yes. I have found that 3-way toggles that run into a master volume harness cause undesirable comb filter effects in middle position. So the blend pot allows both pups to be on and (allegedly, as this is my first blend pot) reduces the comb filtering since you can tweak it a little left or right of center position. Plus you can still blend the pups even though you only have one volume knob in the harness. And only need one Tonestyler for the two pups this way.
 
Last edited:

thornev

Junior Member
Joined
Oct 15, 2021
Messages
79
Reaction score
33
Location
Hudson Valley NY
Guild Total
1
Do you still get the option of having only one pup on if the blend control is full clockwise or full counterclockwise with no negative effect?
 

mellowgerman

Senior Member
Joined
Sep 21, 2008
Messages
4,126
Reaction score
1,560
Location
Orlando, FL
Yes blend pots are great! Just be sure to get a no-load blend, or disassemble and cut the tracers on the end of the tracks
 

lungimsam

Senior Member
Joined
Oct 1, 2011
Messages
2,618
Reaction score
1,674
Guild Total
2
Stellartone told me that they recommend the CTS-EP-6386 blend pot and said:
“Thanks for your question. The three-knob "master-blend-tone" is one of our most-popular control plans. I've attached our "before & after" wiring PDF to this reply. It was somewhat hidden in our links about the Fender J-Bass.

Note that proper operation requires a 500k/500k ohm MONO BLEND POT, such as these models: https://store.stellartone.com/product.asp?specific=2062 https://store.stellartone.com/product.asp?specific=2061. Don't use a 250k/250k... and never use a STEREO PAN POT! The latter type never reaches zero ohms = full volume to both pickups, when set in the center detent.”
 
Last edited:

thornev

Junior Member
Joined
Oct 15, 2021
Messages
79
Reaction score
33
Location
Hudson Valley NY
Guild Total
1
Could a 3-way be made to be a blend pot if I figure out how to remove the middle step so the movement is smooth with no stops?
 

mellowgerman

Senior Member
Joined
Sep 21, 2008
Messages
4,126
Reaction score
1,560
Location
Orlando, FL
unfortunately no, the pan potentiometers require resistive tracks to function.

images (1).jpeg


Here's a neat thread on talkbass that gives instructions on how to turn a common blend potentiometer into a no-load blend potentiometer (as I mentioned in my previous post):

This allows the extremes (when you have one pickup or the other selected) to be the pure signal, without the load of the potentiometer
 
Top