NGD 1970 M-75

BradHK

Senior Member
Joined
Jul 1, 2014
Messages
1,047
Reaction score
2,712
Another day another Guild project. I have had this for a couple weeks but had not got around to doing a NGD post. This is the guitar in this earlier post:


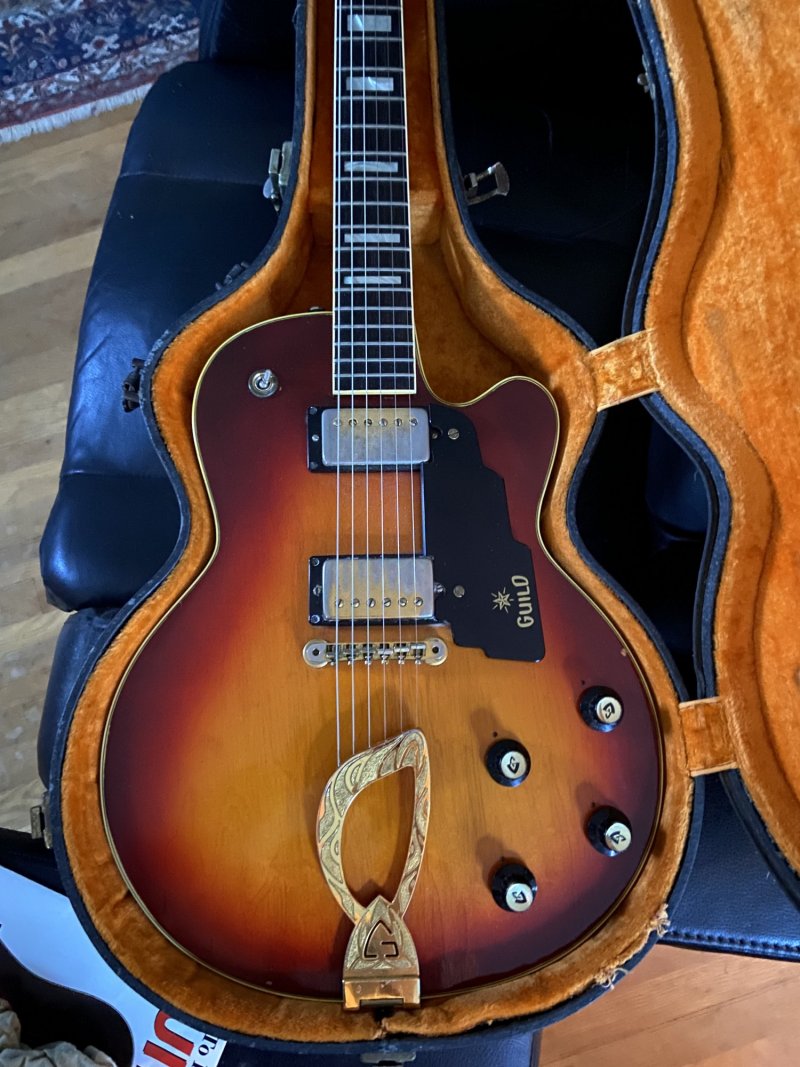
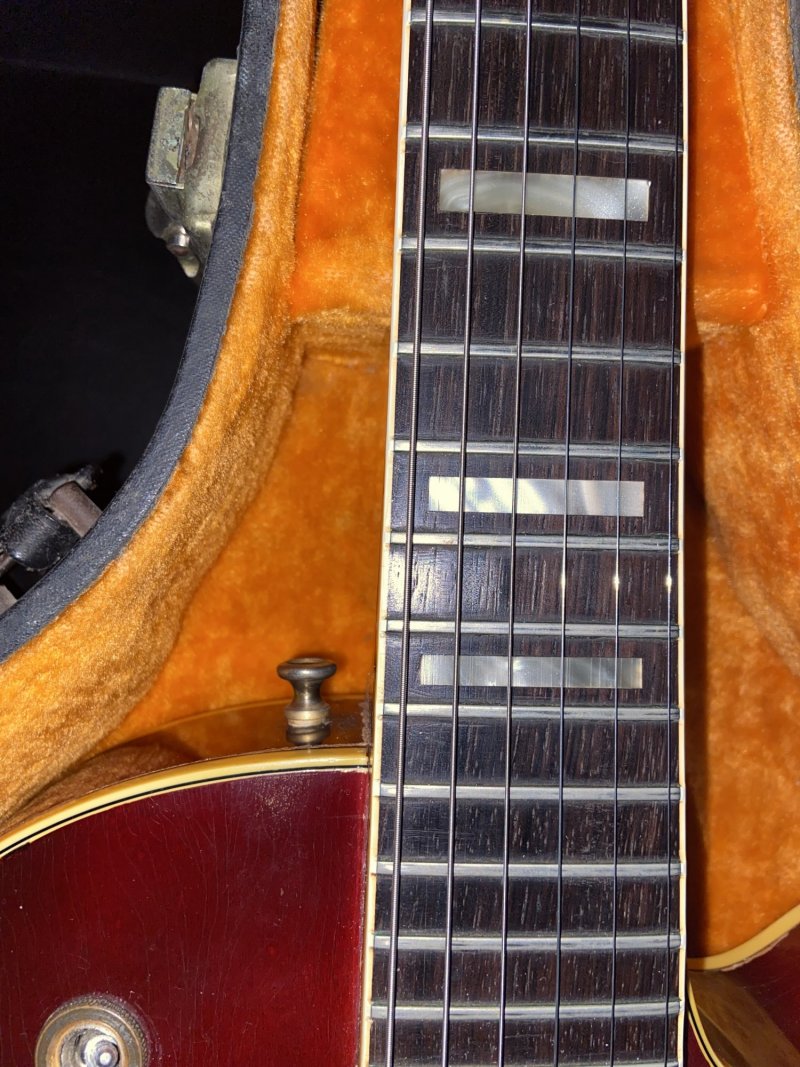
Here are some photos before bringing it back to a better life:

1675019122145.jpeg
1675019161520.jpeg

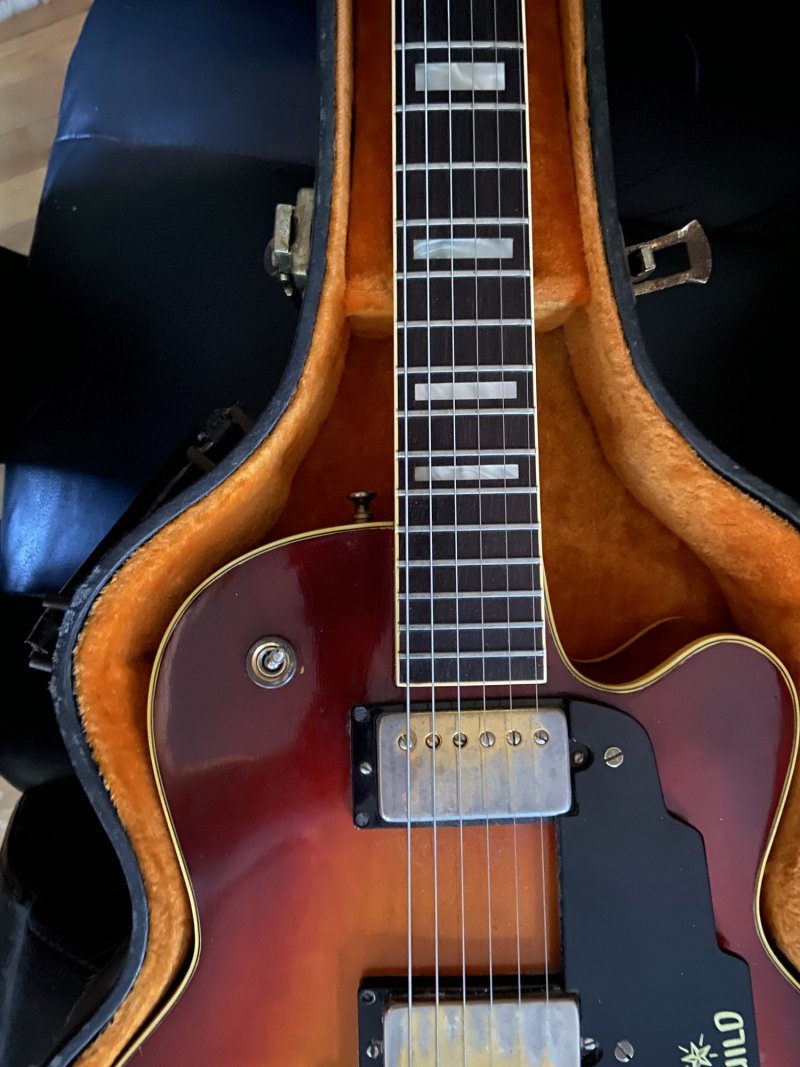
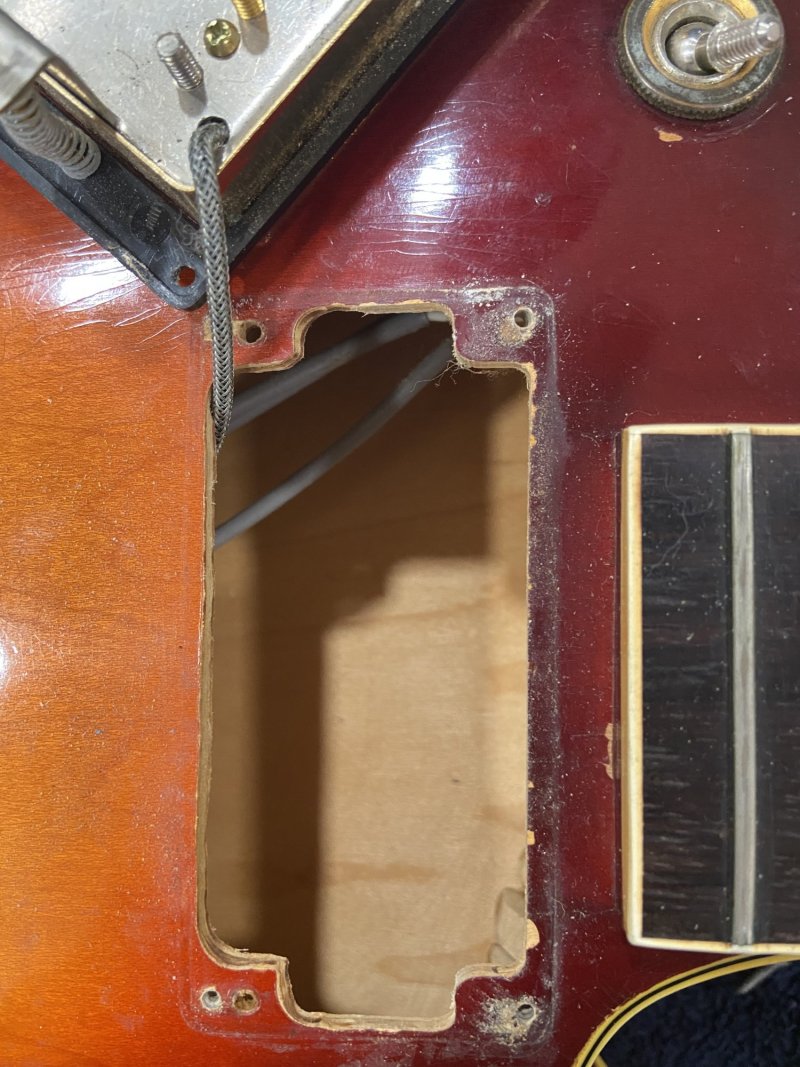
I am a sucker for Aristocrats and hollow Bluesbirds and the DeArmonds made this different than my other ones and my others also have the neck joining the body at the 16th fret. This one has had a rough life, as was clearly evident in the photos. However, structurally everything is good with great binding and the headstock veneer isn’t even shrunk. Other than the tuners, pickups and one strap button it appears all original. Unfortunately, the serial number is gone so the exact date is hard to determine but the pots all date to the 16th week of 1970 and the pickguard mounting holes are for the Anti-hum pickups rather then HB-1 (Thanks Hans!) so it should be a 1970. The pickups are original vintage DeArmonds and the body was routed to fit them with an “ok” job on the pickup rings. I have torn everything apart to clean, inspect, etc. I am drop filling some of the finish areas that were down to the wood but not over spraying to preserve the original finish. I am struggling with the neck as the finish was removed down to the wood. Do I leave as is, refinish black, overspray in clear, etc…? Those are the items going through my head. If it was worn through by use I would leave it ”as is“ but given that somebody removed it (and left the edges so poorly done) I am thinking about making it look a little better. Any ideas welcome.

ok, what’s up with people gluing bridges to the bodies of guitars?!? This is the second vintage Guild I have purchased where the bridge was glued to the top! Of course it pulled some finish up when removed so that is one area I am addressing.

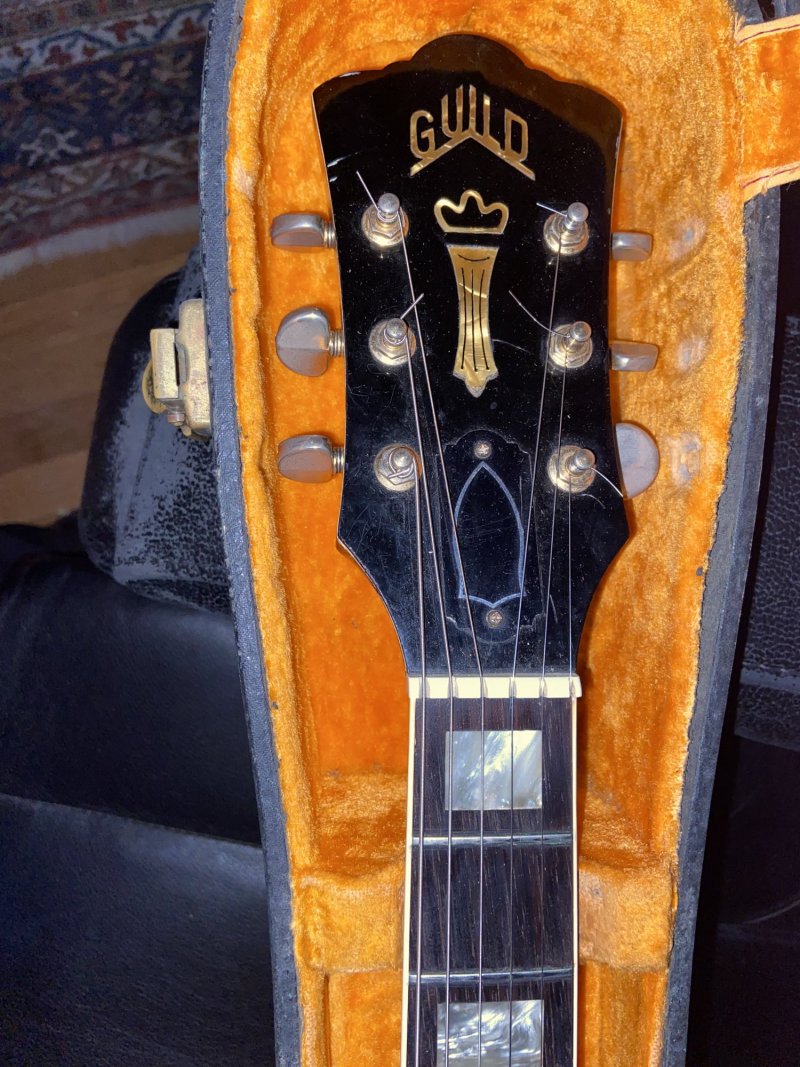
I don’t give my guitars names but this one has already gotten the nickname T-Rex from the replacement tuners being mounted upside down and this image posted by The Guilds of Grot in the thread above:

1675018334491.jpeg

The holes from the replacement tuners have been plugged and I am drop filling the lacquer and then I will install the correct tuners. I have a set of original tuners ready!

1675019780296.jpeg

Hopefully everything will be done in the next few weeks and I will post some “after” photos
 

jp

Senior Member
Joined
Apr 21, 2006
Messages
4,882
Reaction score
1,798
Location
Pacific Northwest US
Guild Total
4
Too cool, Brad! I like all of your plans for this beauty so far. I think it might be good to do your restorations and then leave the neck to see if you like it that way first. You can always do the back of the neck afterwards if it bugs you.

As always, looking forward to your progress!
 

GGJaguar

Reverential Member
Joined
Jan 17, 2011
Messages
21,887
Reaction score
32,226
Location
Skylands
Guild Total
50
Looking forward to reading your progress report(s). I'm sure it will turn out great just as your other projects do.
 

BradHK

Senior Member
Joined
Jul 1, 2014
Messages
1,047
Reaction score
2,712
Too cool, Brad! I like all of your plans for this beauty so far. I think it might be good to do your restorations and then leave the neck to see if you like it that way first. You can always do the back of the neck afterwards if it bugs you.

As always, looking forward to your progress!
Probably the smartest approach. Another option I thought of is to leave the back of the neck “natural” (as somebody removing the paint is part of it’s history) but just cleaning up the paint lines at the ends so it looks less butchered.

What I love about vintage guitars, that are not museum pieces, are the stories they tell from years and years of playing. The wear, nicks, etc.. What I don’t like are holes from replacement tuners and items like that or finish areas down to the wood that are not stable and the lacquer keeps chipping away. For example, on this guitar I am plugging and drop finishing three areas: extra tuner holes, extra strap button hole on the heel, and a screw hole in the side (??). I am also drop filling the large chips on the back and where the bridge feet were glued down. I will then very carefully wet sand to 3k and then compound and polish. The finish should look good but will still show use and wear which is appropriate for this guitar.
 
  • Like
Reactions: jp

gilded

Senior Member
Joined
May 2, 2007
Messages
3,479
Reaction score
197
Location
texas
Love the DeArmonds. I had some in a '69 DE400 and learned how to get a good sound out of it literally just before a guitar show.

For all you boys and girls with solid color M-75s, I thought I'd cleverly add a few pics of my 'sunburst' model. It comes with a pic from IMG_2105 which is a loaded with a matched set of '60s Gibson patent number pics.

Also, if you're smarter than i am (no great feat) you can see how the Gibsons fit pretty well originally into the Gibson cut-outs. A few people thought that the HB-1 would fit in, but others have explained that it was more likely it would have not been inside the 'original'
pick-ups.

They look good, have a ball. All the best, gilded
 

Attachments

  • IMG_2102.jpg
    IMG_2102.jpg
    580.6 KB · Views: 81
  • IMG_2104.jpg
    IMG_2104.jpg
    615.2 KB · Views: 76
  • IMG_2105.jpg
    IMG_2105.jpg
    517.5 KB · Views: 84
  • IMG_2099.jpg
    IMG_2099.jpg
    470.6 KB · Views: 85
  • IMG_2100.jpg
    IMG_2100.jpg
    403.2 KB · Views: 90

gilded

Senior Member
Joined
May 2, 2007
Messages
3,479
Reaction score
197
Location
texas
A truss rod cover?? Were you looking for something specific??
 

SFIV1967

Venerated Member
Joined
Nov 20, 2010
Messages
18,500
Reaction score
9,024
Location
Bavaria / Germany
Guild Total
8

gilded

Senior Member
Joined
May 2, 2007
Messages
3,479
Reaction score
197
Location
texas
Oh, I get it.

'Heraldic Harry and his Senseless, Upside Down, Warriors!
 

Attachments

  • IMG_2099.jpg
    IMG_2099.jpg
    470.6 KB · Views: 62
  • IMG_2100.jpg
    IMG_2100.jpg
    403.2 KB · Views: 57
  • IMG_2105.jpg
    IMG_2105.jpg
    517.5 KB · Views: 62
  • IMG_2104.jpg
    IMG_2104.jpg
    615.2 KB · Views: 62
  • IMG_2102.jpg
    IMG_2102.jpg
    580.6 KB · Views: 65

BradHK

Senior Member
Joined
Jul 1, 2014
Messages
1,047
Reaction score
2,712
Ok, all lacquer work done and it is mostly back together. It should be back up and playing tomorrow as I just need to tweak a few items. I thought I would share some before and after photos of a couple drop fills and such. The bad news is that it was obvious that the back of the guitar had been poorly refinished at some time. There were two layers and the finish work somebody did was not nitro so it did not bond properly to the original finish. Very poor work! I hate overspraying a vintage guitar but I refinished just the back up to the binding edge as it had already been refinished and was peeling off. I left the dents and bumps in the surface as I did not want it looking “new” but I wanted a nice even coat of nitro. I sprayed a couple base coats of clear nitro to seal the bare spots, then black, then aged clear on top. I also plugged the hole in the heal from where a strap button had been added. The heel cap was gouged and such but I left that visible as the goal was to not make it look new.

I have a photo of the headstock above but here are a couple before and after without tuners. I drop filled just the holes and a couple spots where the finish was chipped and not stable. At the top of the headstock you can see where somebody trashed the serial number and then painted the top edge black. I drop filled the gouges made and was able to remove the black paint back down to the original finish. The “after” photo is not the best as it is now a nice smooth shiny surface.

Before

1678456344958.jpeg

After

1678456465143.jpeg

Back before

1678456529845.jpeg

Back after

1678456578548.jpeg
 

Guildedagain

Enlightened Member
Joined
Jun 8, 2016
Messages
9,101
Reaction score
7,264
Location
The Evergreen State
I'm not usually of touch ups or buckle rash resprays, but necessity is a mother.

You could distress in the same spots or not.

At this point, just reshoot the back of the neck?

You really can't leave wood like that, unless you like constant weather related action woes, even with Tung oil, etc.
 

BradHK

Senior Member
Joined
Jul 1, 2014
Messages
1,047
Reaction score
2,712
Thanks for the comments. I am torn regarding the neck. It was a really difficult decision regarding the back of the guitar but the back already being refinished got me over the line. The rest of the original finish cleaned up really well and the back does not jump out as being refinished or out of place. I am sure the back will be naturally relic‘d over time as I play it! I waxed the back of the neck to keep out dirt and such and I will see how that works over time. The interesting part is that originally I was going to refinish the back of the neck but now that I had to refinish the back I don’t want to do anything with the neck as I don’t want it to feel like a full refin. I know, that makes no sense! I will post pictures of the finished restoration this weekend. Thanks again for all of the thoughts and comments!
 

BradHK

Senior Member
Joined
Jul 1, 2014
Messages
1,047
Reaction score
2,712
Well, I had more time than I thought today, and I really wanted this guitar ready to play over the weekend. All is together and the restoration is complete! When I first received the guitar it just felt abused. It had potential but was not inspiring to play or look at. There were a few surprises along the way. I knew about the tuners mounted upside down but was surprised that it had the vintage DeArmonds (score!) but they were mounted in the wrong positions. The shorter neck was in the bridge position and the taller bridge was in the neck! The previous owner raised the pickup magnets in the bridge to try to get closer to the strings. I rewired these to be in the correct position, shaped the pickup rings somebody crudely made to match the way Guild did them when they used DeArmonds in the late 1960’s on a few Bluesbirds, installed springs the correct length so they could be adjusted and now they sound fabulous. Everything else was cleaned up and all parts (other than the pickups, pickup rings and misc screws) are original period correct (I think but I could be corrected!). The wiring harness was all original and all they did was solder the harness to the back of the pickups so that was an easy fix. Guitar has been set up and it plays great. Much different sound than my other vintage M-75s and M-65s with Franz, Frequency tested, Anti-hum, and Mickey Mouse pickups.

I am ready for a fun weekend playing this guitar and the work and wait was worth it!

photos:

1678481645866.jpeg

1678481811562.jpeg

1678481855724.jpeg

1678481892376.jpeg

1678481936355.jpeg

1678482003349.jpeg
 
Top